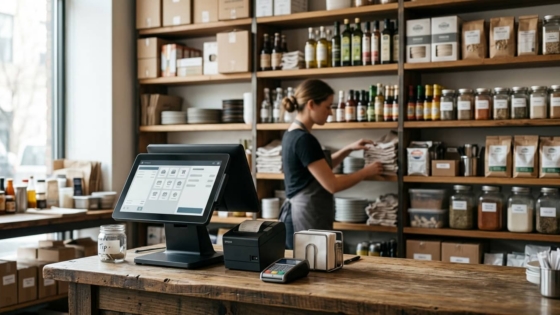
If you’re using Tunvo’s standalone printer mode — where the AI takes phone orders and prints them directly in your kitchen without a POS system — you need a printer that can receive print jobs from the cloud or over your local network. Star Micronics printers are among the most widely used in this kind of setup, and they’re compatible with Tunvo’s print routing system. This guide walks you through the full setup process for the most common Star Micronics models, covering both LAN (Ethernet) and CloudPRNT connection methods.
Before diving in: if your restaurant already runs on MenuSifu, you don’t need to set up a standalone printer for Tunvo — the integration routes orders directly into your POS. This guide is specifically for operations using Tunvo without a POS, or those adding a dedicated kitchen printer for call-in orders alongside an existing setup. For context on the difference, see our product overview.
Key Takeaways
- Star Micronics printers with LAN or CloudPRNT capability are fully compatible with Tunvo’s standalone printer mode.
- LAN (Ethernet) connection is the most reliable for kitchen environments — prefer it over WiFi wherever possible.
- The setup process takes approximately 20–30 minutes from unboxing to first test print.
Compatible Star Micronics Models
Star Micronics builds printers specifically for restaurant kitchen environments — including high-heat, high-humidity back-of-house conditions. Not all models in their lineup support the network connectivity that Tunvo requires. The following table covers the most common models you’ll encounter:
| Model | Connection Type | CloudPRNT | Best For | Tunvo Compatible |
|---|---|---|---|---|
| TSP143IV (LAN) | USB + LAN + AOA | ✅ Yes | Front counter, compact kitchen | ✅ Yes |
| mC-Print3 (LAN) | USB-C + LAN + Bluetooth | ✅ Yes (CloudPRNT Next) | Front & back of house, splash-proof | ✅ Yes |
| SP742 Impact | LAN + Bluetooth | ✅ Yes | High-heat kitchens, two-color printing | ✅ Yes |
| TSP143III (USB only) | USB only | ❌ No | Single terminal setups | ❌ Not compatible |
| mC-Print3 (Bluetooth only) | Bluetooth + USB | ❌ No | Mobile setups | ❌ Not compatible |
The rule of thumb: if your Star Micronics printer has an Ethernet (LAN) port or is specifically labeled as CloudPRNT-enabled, it will work with Tunvo. If it only connects via USB or Bluetooth to a single device, it won’t.
Method 1: LAN (Ethernet) Setup — Recommended
Ethernet connection is the most reliable method for kitchen environments. It doesn’t drop packets due to WiFi interference from nearby appliances or crowded wireless networks, and it maintains a stable connection during high-volume periods when your kitchen’s wireless traffic is heaviest.
What You’ll Need
- Your Star Micronics printer (any LAN-capable model)
- An Ethernet cable (Cat5e or Cat6)
- An available Ethernet port on your router or network switch
- Access to your router’s admin panel (to assign a static IP)
Step-by-Step: LAN Connection
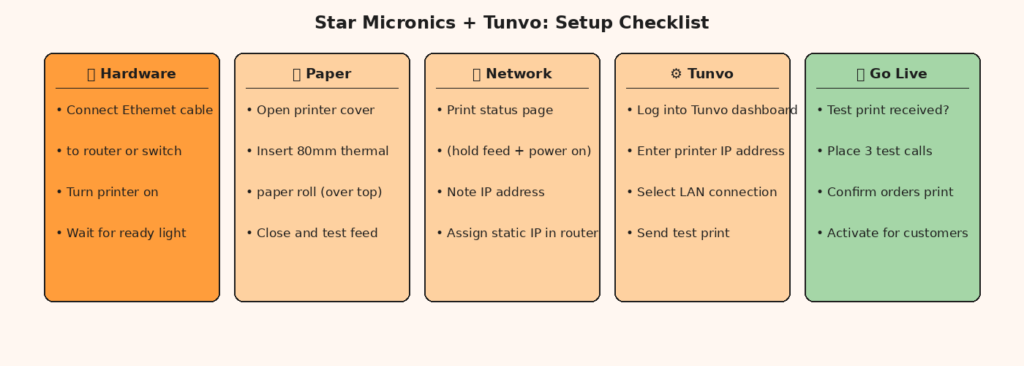
1. Physical setup: Connect the Ethernet cable from your printer’s LAN port to an available port on your router or network switch. Connect the power cable and turn the printer on. Wait for the ready light to turn solid (not blinking).
2. Load paper: Open the printer cover by pressing the lever on the front (TSP143 series) or side (mC-Print3). Insert the paper roll so the paper feeds over the top of the roll. Pull a few inches of paper past the cutter before closing the cover.
3. Find the printer’s IP address: To print the IP address from a Star TSP100/TSP143 series printer, hold down the feed button, turn the power on while continuing to hold it, wait for the printer to start printing, then release. Two test receipts will print. The bottom of the second receipt shows the Current IP Parameters — note the IP Address field. If it shows 0.0.0.0, the printer couldn’t get a network address — check that the Ethernet cable is firmly seated at both ends.
4. Assign a static IP address: Log into your router’s admin panel (typically by opening 192.168.1.1 or 192.168.0.1 in a browser). Find the connected devices list and locate your printer by its MAC address (also printed on the test receipt or on a label on the bottom of the printer). Assign the printer a static (reserved) IP address — this prevents the router from assigning it a different address after a restart, which would break Tunvo’s connection.
5. Register in Tunvo: Log into your Tunvo dashboard and go to the Printer Settings section. Enter the printer’s static IP address and select “LAN” as the connection method. Tunvo will attempt a test print. If the test ticket prints, the printer is registered and ready for live orders.
Method 2: CloudPRNT Setup
Star’s CloudPRNT technology allows internet-connected services to send print jobs directly to a registered printer anywhere in the world. This is the same technology Star uses for DoorDash and Uber Eats direct-to-printer integrations. It requires the printer to have an active internet connection (via LAN or WiFi) and to be registered with Star’s CloudPRNT service.
When to Use CloudPRNT Instead of LAN Direct
Use CloudPRNT if: your router doesn’t support port forwarding or static IP assignment; you want the printer to receive jobs from outside your local network; or your technical setup is simpler to manage through Star’s cloud service than through direct IP configuration. For most small restaurant setups with a standard home router, LAN direct (Method 1) is simpler. CloudPRNT is particularly useful for multi-location setups or if your network topology is managed externally.
CloudPRNT Setup Steps
1. Ensure your printer is connected to the internet (via LAN cable or, for compatible models, WiFi). Confirm the printer has internet access by printing the network status page (same procedure as finding the IP in Method 1 — the status page will show whether an internet connection is active).
2. On your printer, the CloudPRNT service URL needs to point to Tunvo’s CloudPRNT endpoint. This is configured through the Star Utility app on a connected device, or in some models through a web-based configuration panel accessible via the printer’s IP address. Tunvo support will provide the correct CloudPRNT service URL when you activate CloudPRNT mode in your Tunvo account.
3. In your Tunvo dashboard, select CloudPRNT as the connection method and enter your printer’s registration token. Tunvo will confirm the connection and send a test print.
Troubleshooting Common Printer Setup Issues
Test Print Doesn’t Work After LAN Setup
First, confirm the printer and your router are on the same network subnet. If your router is at 192.168.1.1, the printer’s IP should be 192.168.1.xxx. If the printer’s IP shows a different subnet (like 10.0.0.xxx), they may be on different network segments. Check that the Ethernet cable connects the printer to the same router your Tunvo device is on. Restart the printer after making any IP changes and reprint the status page to confirm the new address is active.
Printer Goes Offline After Working Correctly
This is almost always caused by a dynamic IP assignment — the router assigned the printer a new IP address after a restart. Confirm you’ve assigned a static/reserved IP for the printer in your router settings (see Step 4 of the LAN setup). Once a static IP is set, the printer will always receive the same address on your network and Tunvo will be able to reach it consistently.
IP Address Shows 0.0.0.0
The printer couldn’t establish a network connection during boot. Check that the Ethernet cable is firmly connected at both the printer and router ends. Try a different Ethernet port on your router. If the cable appears damaged, replace it. After resolving the physical connection issue, restart the printer and reprint the status page.
CloudPRNT Jobs Not Arriving at Printer
Confirm the printer has an active internet connection by checking the network status page. If the internet connection field shows “Not Connected,” check your router and internet service. If the connection is active but print jobs still aren’t arriving, confirm that the CloudPRNT service URL configured in the printer matches what Tunvo provided. Contact Tunvo support with your printer model and registration token if the issue persists.
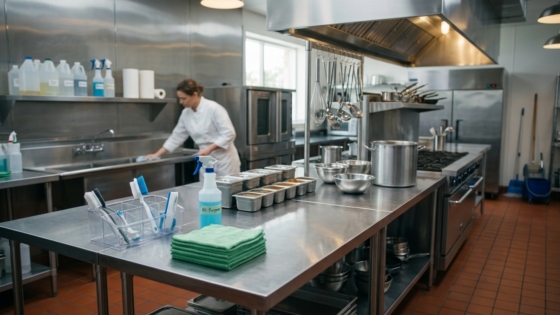
Maintenance Tips for Long-Term Reliability
Once your printer is running, a few simple habits prevent the most common ongoing issues:
- Check paper at the start of every shift. Low paper is the most common cause of missed prints during a busy service. Most Star printers show a warning indicator when paper is running low — don’t ignore it.
- Use 80mm thermal paper compatible with your model. Star’s mC-Print3 series uses 80mm width thermal paper. Using incompatible paper rolls causes print failures and can damage the print head over time.
- Keep the printer away from direct kitchen heat sources. Thermal print heads are sensitive to extreme heat. The mC-Print3 is designed for controlled kitchen environments — if your printer will be positioned near cooking equipment, the SP742 impact printer (which uses carbon paper ribbons rather than heat-sensitive paper) is more suitable for high-heat conditions.
- Restart the router monthly. Monthly router restarts clear accumulated network state and often resolve slow or dropped connections before they become obvious problems.
Frequently Asked Questions
Can I use a non-Star Micronics printer with Tunvo?
Tunvo’s standalone printer mode is designed and tested with Star Micronics printers. Other printer brands may work if they support standard ESC/POS protocol over LAN, but compatibility is not guaranteed. Contact Tunvo support with your printer’s model and connectivity specs before purchasing a non-Star printer for this purpose. For a hassle-free setup, the recommended path is to start with a tested-compatible Star model. See our product overview for the current compatible hardware list.
Do I need to buy a new printer if I already have one?
Only if your existing printer is USB-only or Bluetooth-only. If you have a Star Micronics printer that already has a LAN port and you’ve been using it connected to a POS or tablet, it should be configurable to also receive Tunvo print jobs. Contact support with your printer model to confirm.
What size paper does Tunvo print orders on?
Tunvo prints on standard 80mm thermal receipt paper, which is the most common size for restaurant receipt printers. Order tickets are formatted to fit on a standard receipt roll with clear item grouping, modifier detail, and timestamp.
Can I set up multiple printers — one for the counter and one in the kitchen?
Yes. You can register multiple printers in your Tunvo account and configure routing rules — for example, all phone orders print to the kitchen printer, while a customer receipt (if desired) prints to the counter printer. This is a configuration option available in the Tunvo dashboard. Book a demo to see the multi-printer routing workflow in action.
Need help setting up your printer with Tunvo? Our team walks you through setup as part of onboarding. Start Your Free Trial and get hands-on support from day one.